
Some desserts are cute.
Some desserts are good.
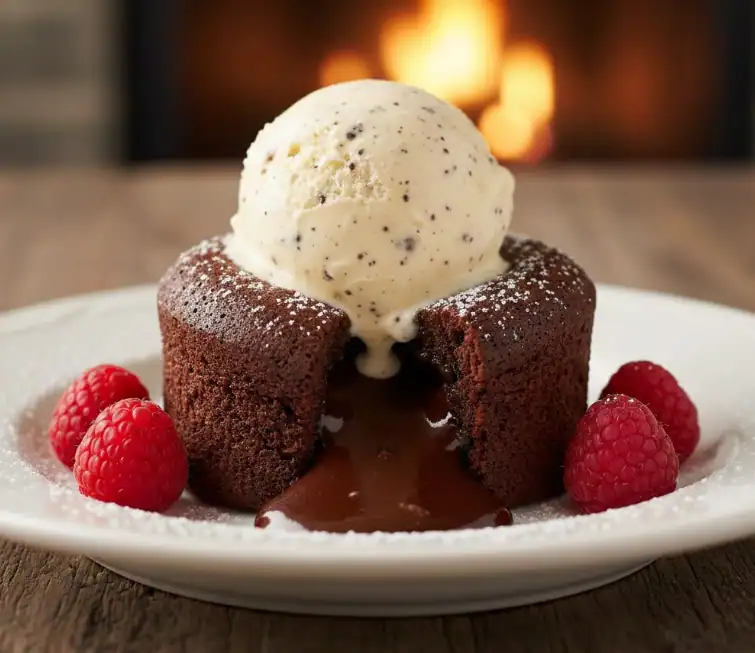
And then there are chocolate lava cakes, which exist solely to make people fall in love with you.
If you’re planning a date night (or just treating yourself because self-love is hot), this chocolate lava cake recipe is the move. It’s rich, gooey, dramatic in the best way, and somehow feels both fancy and effortless at the same time. Like you definitely know what you’re doing… even if you don’t.
The best part? You only need a handful of ingredients, one bowl, and about 20 minutes. No stand mixer. No chilling. No emotional distress.
Let’s get into it.
Why Chocolate Lava Cakes Are the Ultimate Date Night Dessert
Chocolate lava cakes have main-character energy. You cut into them, and suddenly there’s molten chocolate spilling out like it’s a movie scene. It’s intimate. It’s cozy. It’s giving “romantic dinner at home but better.”
They’re also:
- Perfect for date night at home
- Easy to make for two
- Way more impressive than they are difficult
- A guaranteed crowd-pleaser (even if the crowd is just you)
Basically, if you want dessert that says I tried, but I didn’t suffer, this is it.
Ingredients You’ll Need
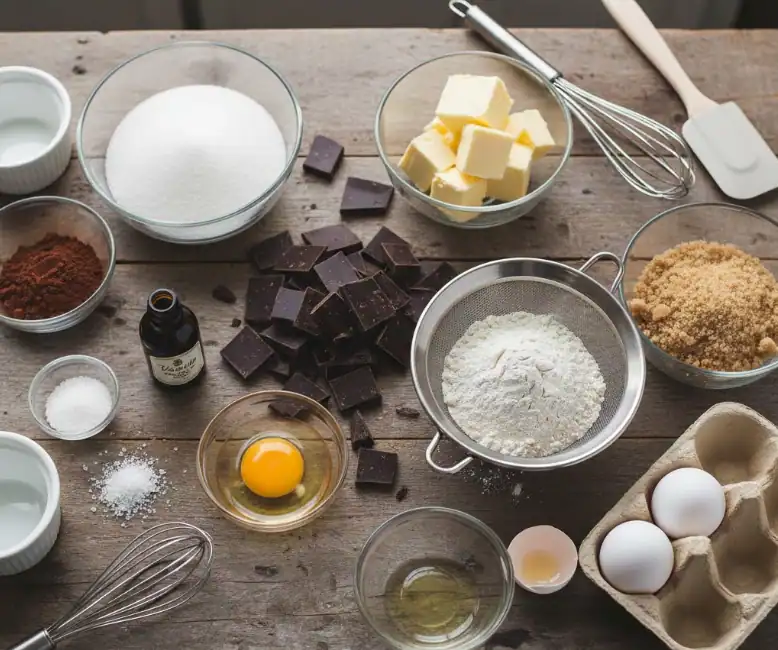
You probably already have most of these in your kitchen, which makes this recipe even better.
- 4 oz semi-sweet or dark chocolate
- ½ cup unsalted butter
- 1 cup powdered sugar
- 2 whole eggs
- 2 egg yolks
- 1 teaspoon vanilla extract
- ¼ cup all-purpose flour
- Pinch of salt
That’s it. No weird ingredients. No expensive chocolate required (but if you want to splurge, go for it).
How to Make Chocolate Lava Cakes (Step-by-Step)
1. Prep your ramekins
Preheat your oven to 425°F (220°C).
Butter two ramekins generously and lightly dust them with cocoa powder or flour. This step is important — no one wants their lava cake stuck to the dish like a bad breakup.
Place the ramekins on a baking sheet and set aside.
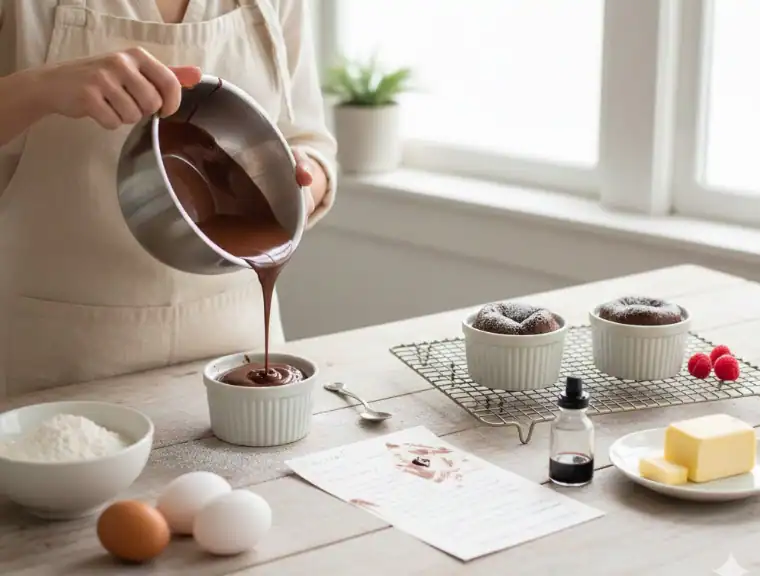
2. Melt the chocolate and butter
In a microwave-safe bowl, combine the chocolate and butter. Microwave in 20-second intervals, stirring each time, until smooth and fully melted.
You can also do this over a double boiler if you’re feeling extra, but microwave is totally fine.
3. Mix in the sugar
Whisk the powdered sugar into the melted chocolate mixture until smooth. It’ll look thick and glossy — that’s exactly what you want.
4. Add the eggs and vanilla
Whisk in the eggs, egg yolks, and vanilla extract until fully combined. The batter should be silky and rich.
At this point, you might be tempted to eat it with a spoon. I get it. Stay strong.
5. Fold in the dry ingredients
Gently fold in the flour and salt just until combined. Do not overmix — we want soft, tender cakes, not brownie bricks.
6. Bake
Divide the batter evenly between the two ramekins.
Bake for 12–14 minutes, until the edges are set but the centers are still soft. This is where the magic happens. If you overbake, you’ll still have a delicious cake… just not the lava moment.
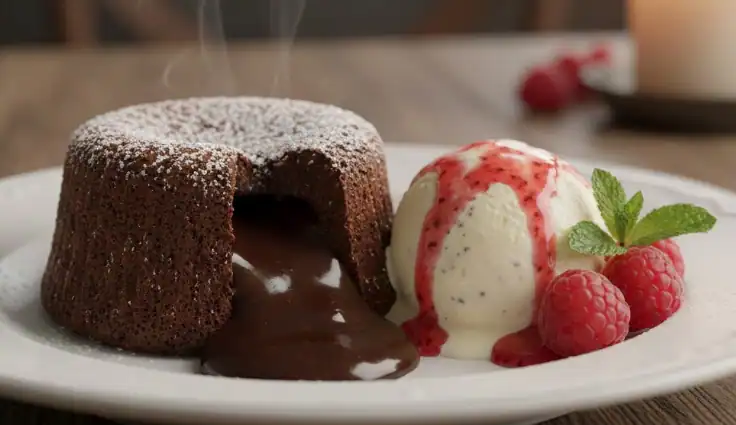
7. Serve immediately
Let the cakes cool for about 1 minute, then carefully run a knife around the edges and invert onto plates. Or serve them straight from the ramekins if you’re keeping it casual (highly recommended).

How to Know When Lava Cakes Are Done
This is the part that stresses people out, but it’s actually simple.
Your lava cakes are ready when:
- The edges look firm
- The center still jiggles slightly
- The top looks set but soft
If you’re unsure, err on the side of underbaking. Gooey is the goal.
Topping Ideas (Optional but Encouraged)
Chocolate lava cakes are amazing on their own, but toppings take them from wow to WOW.
Here are some elite options:
- Vanilla ice cream (classic for a reason)
- Fresh berries
- Powdered sugar
- Whipped cream
- A drizzle of espresso or caramel sauce
- A pinch of flaky sea salt (trust me)
Mix and match based on vibes.
Make-Ahead Tips
You can prep the batter ahead of time and store it in the fridge for up to 24 hours. When you’re ready, just bake straight from the fridge — add about 1 extra minute to the bake time.
This makes lava cakes perfect for:
- Date night
- Dinner parties
- When you want to look effortless but organized
FAQs About Chocolate Lava Cakes
Can I make these without ramekins?
Yes! You can use a muffin tin. Just grease it really well and keep a close eye on bake time (usually 10–12 minutes).
What chocolate works best?
Semi-sweet or dark chocolate is ideal. Milk chocolate works but will be sweeter and less intense.
Can I make them gluten-free?
Yes — swap the flour for a 1:1 gluten-free flour blend. They’ll still be rich and gooey.
Final Thoughts
Chocolate lava cakes are one of those desserts that feel special every single time. They’re cozy, indulgent, and just dramatic enough to make date night feel like an event — without turning your kitchen into a disaster zone.
Whether you’re cooking for someone you’re trying to impress or just romanticizing your own life (as you should), this recipe delivers every time.
Because sometimes love language is molten chocolate.
If You Need More Ideas
We’ve got you covered on the food end of things. You can browse our date night recipes here. If you need a main dish to go with the dessert, you can look here.
Chocolate Lava Cakes for Two (Because Date Night Deserves Drama)
Ingredients
Method
- Preheat your oven to 425°F (220°C).
- Butter two ramekins generously and lightly dust them with cocoa powder or flour. This step is important — no one wants their lava cake stuck to the dish like a bad breakup.
- Place the ramekins on a baking sheet and set aside.
- In a microwave-safe bowl, combine the chocolate and butter. Microwave in 20-second intervals, stirring each time, until smooth and fully melted.
- You can also do this over a double boiler if you’re feeling extra, but microwave is totally fine.
- Mix in the sugar
- Whisk the powdered sugar into the melted chocolate mixture until smooth. It’ll look thick and glossy — that’s exactly what you want.
- Add the eggs and vanilla
- Whisk in the eggs, egg yolks, and vanilla extract until fully combined. The batter should be silky and rich.
- At this point, you might be tempted to eat it with a spoon. I get it. Stay strong.
- Gently fold in the flour and salt just until combined. Do not overmix — we want soft, tender cakes, not brownie bricks.
- Divide the batter evenly between the two ramekins.
- Bake for 12–14 minutes, until the edges are set but the centers are still soft. This is where the magic happens. If you overbake, you’ll still have a delicious cake… just not the lava moment.
- Let the cakes cool for about 1 minute, then carefully run a knife around the edges and invert onto plates. Or serve them straight from the ramekins if you’re keeping it casual (highly recommended).
Notes
Yes! You can use a muffin tin. Just grease it really well and keep a close eye on bake time (usually 10–12 minutes). What chocolate works best?
Semi-sweet or dark chocolate is ideal. Milk chocolate works but will be sweeter and less intense. Can I make them gluten-free?
Yes — swap the flour for a 1:1 gluten-free flour blend. They’ll still be rich and gooey.